Pi-Hole
DNS Sinkhole With Raspberry Pi Powered By Pi-Hole.
Using Raspberry Pi as DNS Server
You can check out the Github Version of this write up HERE
This is
NOTa guide, but this shows how I install and implement Pi-Hole on my network as a learning project, I’m pretty sure there’s something that I miss or write incorrectly.
What Is Pi-Hole?
Pi-Hole is a DNS sinkhole or I would call it as something like a DNS Server that can protect devices that is connected to the Pi-Hole DNS server. see more in depth information of how pi-hole work Pi-Hole Documentation
Reason To Do This Project
The reason that I try to do this project is to understand how DNS work, so i can make my own DNS server, and hopefully protect my network.
Installation
Equipment
Equipment that I use:
- Raspberry Pi 3B+ (Will run the Pi-Hole)
- Laptop (To do SSH to Raspberry Pi)
- Router (TL-WR940N)
- Putty (Helps with SSH connections)
- Memory Card (MicroSD)
Raspberry Pi OS Installation
Tip: You can use other imager, but i’ll be using Raspberry Pi Imager because it comes with the Raspberry Pi OS
Download the Raspberry Pi Imager from Raspberry Pi Imager or you can install it using the terminal using this command.
1
sudo apt install rpi-imager
After the installation of imager is finished, run it, and the imager should look like this: 
My microSD is brand new, so I need to format it to be FAT32, but thankfully, the imager already got that function CHOOSE OS > ERASE > CHOOSE STORAGE > WRITE
With the Formatted microSD, Choose Storage > MicroSD, and pick the operating system, I’ll be using the Raspberry Pi OS (32 Bit)
After Choosing the OS, a GEAR logo should appear, with this gear logo, you can enable settings that could help set up Headless Raspberry Pi

- Enable the
Set Hostnameif the hostname wanted to be changed - Enable the
Enable SSH, this is needed for headless connection with the Raspberry Pi - Enable the
Set Username and Password, this will be used when we connect to Raspberry through SSH - Enable the
Configure Wireless LAN, this is needed so that the Raspberry can connect to the Wi-Fi,SSIDis the name of Wi-Fi. and thePassword, is the Password for the Wi-Fi. SAVE
After all that is done, press WRITE and the imager should start installing to microSD. With the Installed OS in the microSD, insert it to the Raspberry Pi and power it on.
Pi-Hole Installation
Find a detailed installation of Pi-Hole here
With the finished OS Installation, Turn on the Raspberry Pi and go to the router admin view or use an application called Angry IP Scanner to scan the IP of the Raspberry Pi to do headless configuration. Headless means that the Raspberry is not directly connected using keyboard or monitor.
In this case im using a TP-Link Router, and to access the router admin setting, usually theres a default IP for the router behind the router, or you can connect it via ethernet LAN and do this command:
1
2
ifconfig
ipconfig
This will shows the default gateway, in my case, the default gateway is 192.168.0.1
After knowing the default gateway, go to Chrome or any other search engine, and type in the default gateway IP, after that the admin web view should be accessible.
If this is the first time of accessing this admin web view, the
passwordshould be the default password that can be found from the back of the router or searched online. but usually the password isadminor even nothing.
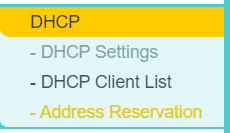
If the password is correctly entered, the router can now be configured. With TP-Link TL-WR940N, the side bar looks like this:
Click on the DHCP and more lists of setting should pop up, the IP and MAC of the devices that connected to the router can be seen here.
If the previous Angryscanner can’t find the Raspberry Pi IP, The IP of the Raspberry Pi should be here. Go to the DHCP Client List and search a Client name with something like raspberry, Copy the IP and MAC of the Raspberry PI and go to the Address Reservation and paste it the IP and MAC of the Raspberry PI, this is done to make sure that the IP of the Raspberry doesn’t change if the Raspberry PI is turned off. After all of that is finished, it should look like this:
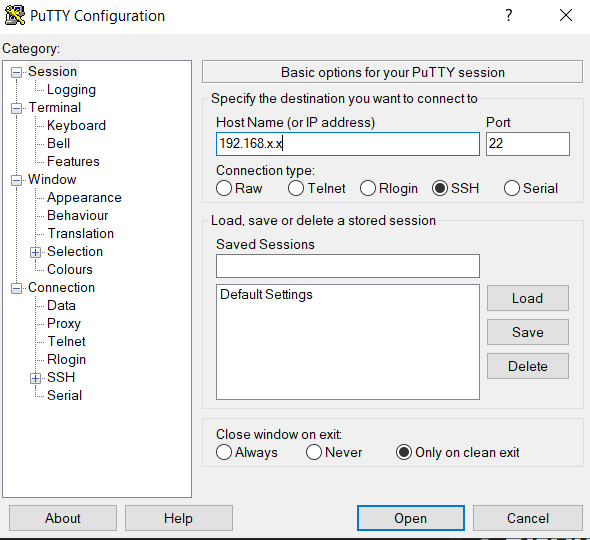
Ok. Now access the Raspberry PI with Putty by entering the IP address of the reserved IP:
After the Hostname or IP address of the Raspberry Pi is entered, Click Open and a window will pop up, asking login as and followed by the password that has been setup in the Raspberry Pi Imager, and it should look like this:
The line of the CLI will be green indicating that we’ve been connected to the Pi, after that we can install the Pi-Hole by using this command:
1
curl -sSL https://install.pi-hole.net | bash
or
1
wget -O basic-install.sh https://install.pi-hole.net
After the download is finished run this command:
1
sudo bash basic-install.sh
Raspberry Pi should start downloading and installing the Pi-Hole. After the download is finished, it will shows a configuration setting for the Pi-Hole, Just press Yes to all of it and use the Wlan0 as the connection.
Implementation
Pi-Hole Implementation
With the installation of Pi-Hole finished, we can access the web interface by searching this address in the search engine:
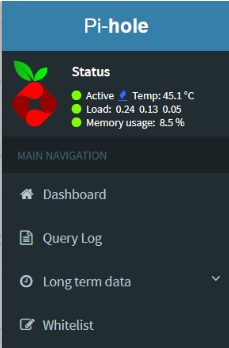
The interface will look like this, as of Pi-Hole version 5.11.3 and web interface version 5.13
To access the information, Click on the Login using the provided password when installing the Pi-Hole or using custom password by doing this command:
1
pihole -a -p
use this command to know more about Pi-Hole
1
man pihole
Well basically the DNS server using Pi-Hole is finished!!, but to make sure if the devices in the network is using the Pi-Hole as the DNS server or no, we can use this command to check:
1
nslookup
with
nslookupand providing the domain name likegoogle.com, if the IP address showed the same as the IP address of the Pi-Hole, then the devices on the network is using the Pi-Hole as the DNS Server.
Pi-Hole Addition
To make the blocking capabiliy of the Pi-Hole better, we can add more adlist by using Pi-Hole Adlist, I recommend using the green link to avoid the wrong blocked domain.
Conclusion
In conclusion, Pi-Hole as a DNS Server is a really good learning project, from how to set up the DHCP IP address reservation, accessing router admin configuration, configurating the installation to SSH communication. I learned alot doing this, even though I still don’t know the the best practice, but it still a learning experience.


